
Creating a database on cPanel, especially on a hosting provider like Hostinger, is generally straightforward. Here’s a step-by-step guide to help you:
Step 1: Log in to cPanel #
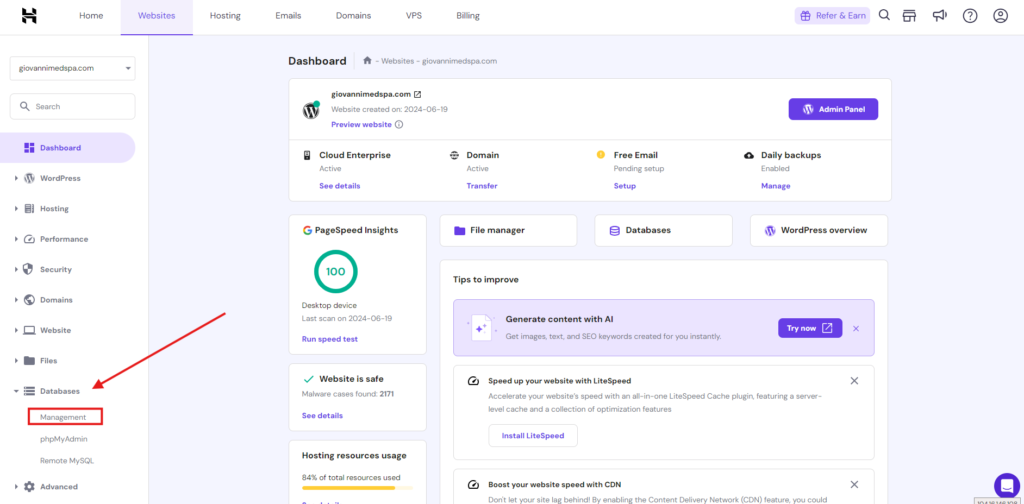
- Access cPanel: Go to your Hostinger account and log in. Navigate to the hosting section where your domain is hosted.
- Find cPanel: Look for an option like “cPanel” or “Control Panel” and click on it. This will take you to your cPanel dashboard.

Step 2: Navigate to MySQL Databases #
- Find MySQL Databases: In your cPanel dashboard, search for the “MySQL Databases” icon or link. It’s typically located in the “Databases” section.
Step 3: Create a New Database #
- Create New Database: Click on the “MySQL Databases” icon/link. You’ll be taken to a page where you can create a new database.
- Name the Database: Enter a name for your new database. This name will be used to identify your database within cPanel. For example, you can name it
mydatabase. - Create the Database: Click on the “Create Database” button to finalize the creation of your database.
Step 4: Create a Database User #
- Add New User: Scroll down to the “MySQL Users” section on the same page.
- Username and Password: Enter a username and password for your new database user. Note that it’s important to use a strong password for security reasons.
- Add User to Database: After creating the user, scroll down to the “Add User to Database” section.
- Select User and Database: Choose the user you just created and the database you created earlier from the dropdown menus.
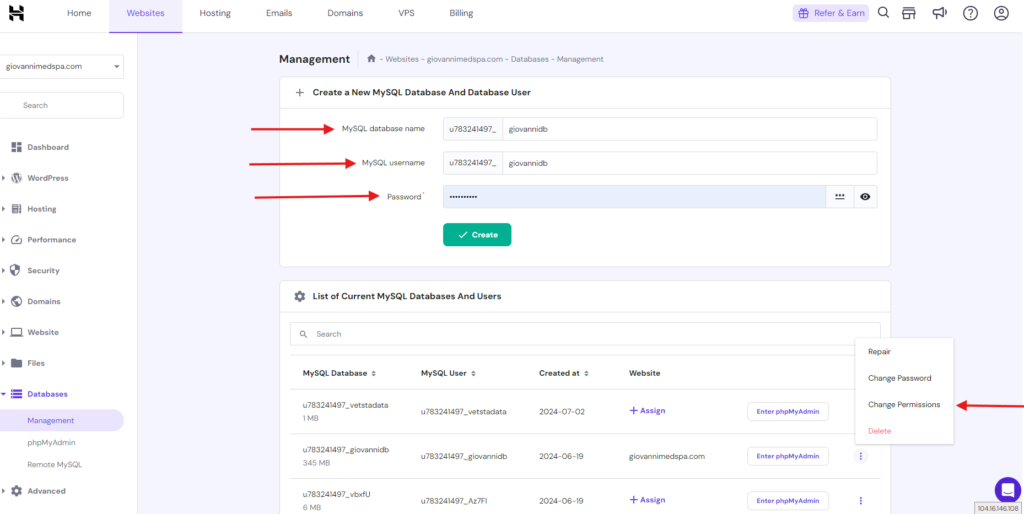
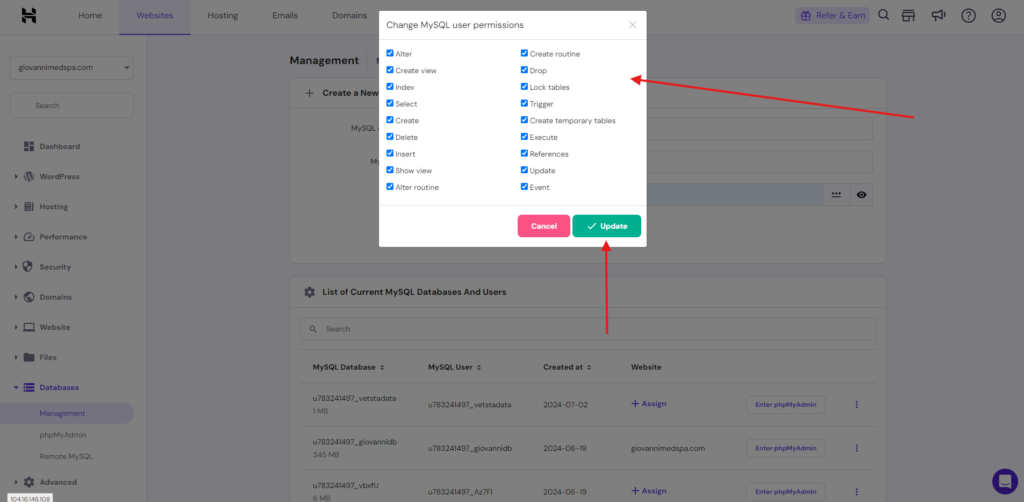
5. Assign Privileges: Assign appropriate privileges to the user for the database. Typically, for most applications, you would grant “All Privileges” to the user.
6. Save Changes: Click on the “Add” or “Submit” button to save the changes.
Step 5: Verify and Use the Database #
- Confirmation: Once you’ve completed the above steps, your database should be ready for use. You can confirm this by going back to the “MySQL Databases” section and seeing your newly created database listed there.
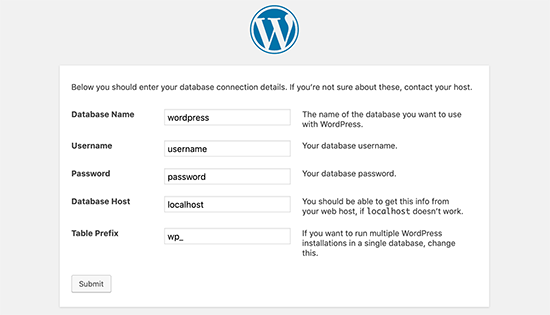
- Connect Your Application: Use the database details (hostname, database name, username, password) to connect your web application or any other software that needs to interact with the database.
Important Tips: #
- Security: Always use strong passwords and keep them secure.
- Backup: Regularly backup your databases using cPanel’s backup tools or any other method provided by Hostinger.
- Permissions: Be cautious with granting database privileges; only grant the minimum required for your application to function properly.
By following these steps, you should be able to create and manage a database on Hostinger through cPanel effectively. If you encounter any issues or need further assistance, Hostinger’s support documentation or customer support can provide additional guidance specific to their platform.


